
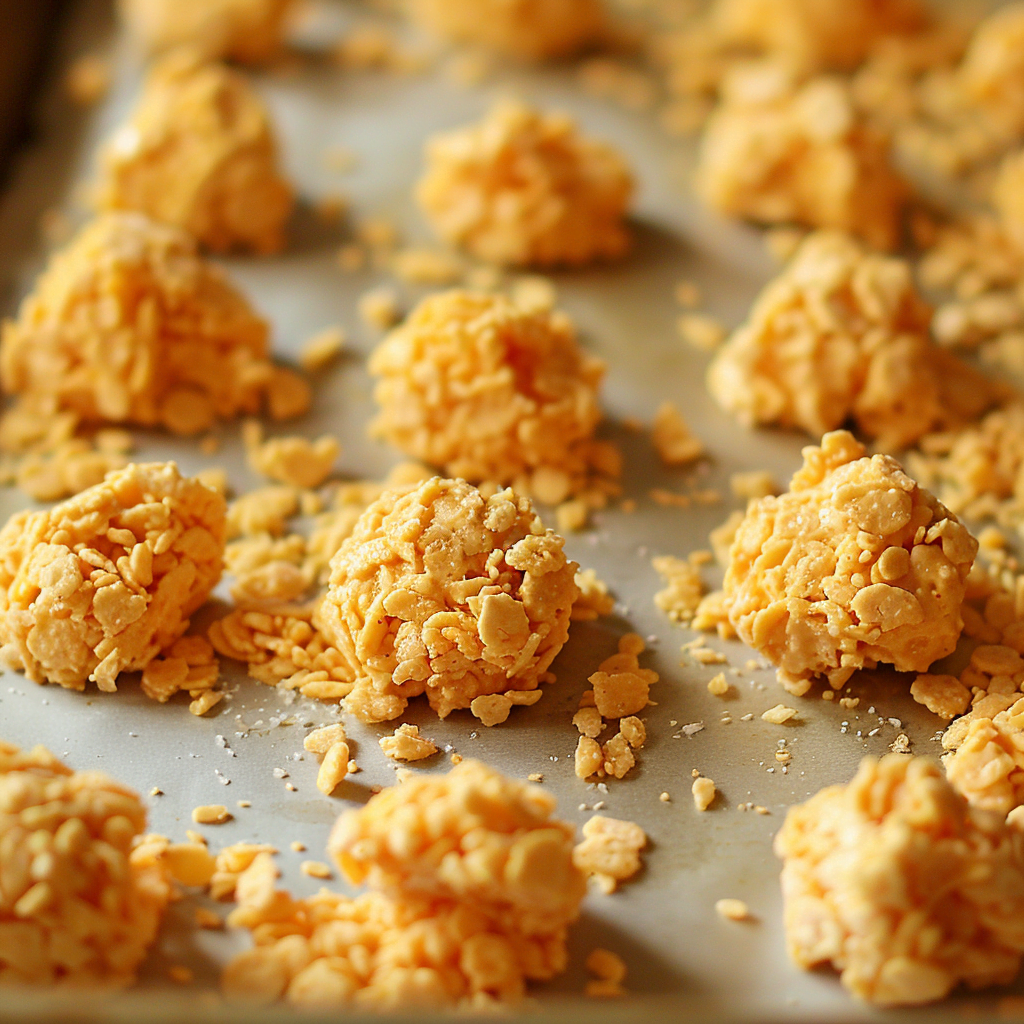
Cheese Crispies are savory, cheesy bites with a delightful crunch from crispy rice cereal. These addictive snacks are perfect for entertaining or simply munching on when you're craving something savory. The combination of sharp cheddar cheese, butter, and cayenne pepper delivers a satisfying flavor punch that pairs wonderfully with the light, crispy texture.
Cheese gives you something delicious as a counterpoint to your beverage, whether you’re sipping a cocktail or a mocktail. They go well with a sip of wine, with White Wine Sangria , Spa Water or Herb Spring Water, or whatever beverage you choose.
Why You’ll Love These Cheese Crispies
- Irresistibly Cheesy: Sharp cheddar cheese gives these bites their rich, savory flavor, making them a hit at any gathering.
- Perfectly Spiced: A hint of cayenne pepper adds a subtle kick, balanced perfectly by the richness of the cheese.
- Crispy Texture: The addition of crispy rice cereal gives these snacks a unique crunch that will keep you coming back for more.
- Great for Entertaining: These crispies are a great make-ahead option for parties, snacks, or holiday gatherings.
- Easy to Make: With simple ingredients and straightforward steps, you’ll have these baked and ready in no time!
Ingredients for Cheese Crispies
- 1 tsp cayenne pepper
- 1 tsp salt
- 3 cups sifted all-purpose flour
- 1 ½ cups butter, softened to room temperature
- 3 cups finely grated sharp cheddar cheese
- 1 ½ cups crispy rice cereal
How to Make Cheese Crispies
1. Prepare the Dry Ingredients
Start by sifting the all-purpose flour into a large mixing bowl to remove any lumps and ensure a smooth dough. Add the cayenne pepper and salt to the sifted flour and whisk together until evenly combined. The cayenne pepper adds a subtle kick, but if you prefer less heat, feel free to reduce the amount.
2. Incorporate the Butter
Next, add the softened butter to the flour mixture. Using a pastry cutter, fork, or your fingers, cut the butter into the flour mixture until it resembles coarse crumbs, similar to a cornmeal-like consistency. The butter is what gives these crispies their rich, melt-in-your-mouth texture.
3. Add the Cheese and Cereal
Now, stir in the finely grated sharp cheddar cheese, mixing thoroughly so that the cheese is evenly distributed throughout the dough. Finally, gently fold in the crispy rice cereal. The cereal adds a delightful crunch to the finished product, giving these snacks their signature texture.
4. Shape the Dough
Roll the dough into 1-inch balls, pressing them together gently in your hands to form a compact shape. The dough will be slightly crumbly, but don't worry—once pressed together, it will hold its shape during baking. Arrange the balls on a baking sheet lined with parchment paper, leaving a bit of space between each one.
5. Flatten the Cheese Crispies
Use a fork or the bottom of a glass (lightly dusted with flour to prevent sticking) to gently flatten each dough ball into a small disc. This helps ensure an even bake and gives the crispies a uniform shape.
6. Bake to Perfection
Preheat your oven to 350°F (175°C). Once heated, bake the Cheese Crispies for about 15 minutes or until they turn golden brown around the edges. Keep an eye on them during the last few minutes of baking to prevent over-browning. The aroma of baking cheese is sure to fill your kitchen with mouthwatering scents!
7. Cool and Store
After baking, allow the Cheese Crispies to cool completely on a wire rack. Once cooled, transfer them to an airtight container to maintain their crispiness. They will keep well for up to a week (if they last that long!).
8. Enjoy!
Serve these Cheese Crispies as a snack, appetizer, or alongside your favorite dips. They pair particularly well with a glass of wine, making them a perfect choice for a happy hour treat.
Variations for Cheese Crispies
- Spicy Cheese Crispies: If you love spice, increase the cayenne pepper to 2 teaspoons or add a pinch of smoked paprika for an extra layer of flavor.
- Herbed Cheese Crispies: Add 1 teaspoon of dried herbs such as rosemary, thyme, or Italian seasoning to the flour mixture for a flavorful twist.
- Nutty Cheese Crispies: Mix in ½ cup of finely chopped pecans or walnuts for an extra crunch and a nutty flavor that complements the cheddar cheese.
- Extra Cheesy: Use a combination of sharp cheddar and parmesan cheese to intensify the cheesy flavor.
Tips for Cheese Crispies
- Grate Your Own Cheese: For the best texture and flavor, grate your own sharp cheddar cheese rather than using pre-shredded cheese. Pre-shredded cheese contains anti-caking agents that can affect how the cheese melts in the dough.
- Crispier Texture: If you prefer your Cheese Crispies to be extra crispy, bake them for an additional 2-3 minutes, keeping a close eye to prevent burning.
- Storage: Store the Cheese Crispies in an airtight container at room temperature. They will stay fresh and crispy for up to one week.
- Make Ahead: You can make the dough ahead of time and refrigerate it for up to 2 days before shaping and baking. This makes them convenient to prep in advance for parties or holiday gatherings.
FAQs for Cheese Crispies
Can I make these gluten-free?
Yes! Substitute the all-purpose flour with a gluten-free flour blend that is suitable for baking. Make sure the crispy rice cereal you use is also gluten-free.
Can I freeze Cheese Crispies?
Absolutely. You can freeze the unbaked dough balls on a baking sheet until solid, then transfer them to a freezer-safe bag. When you're ready to bake, let them thaw slightly, flatten, and bake as directed.
Can I use a different cheese?
Yes! You can use a combination of cheeses like gouda, gruyere, or pepper jack for different flavors. Just make sure to use a cheese that melts well.
What can I serve with Cheese Crispies?
Cheese Crispies are delicious on their own, but you can also serve them with dips like ranch dressing, spicy mustard, or even a marinara sauce. They’re also perfect alongside a bowl of soup or chili.
Approximate Nutrition Information:
- Calories: 150 kcal per serving
- Total Fat: 12g
- Saturated Fat: 7g
- Cholesterol: 30mg
- Sodium: 300mg
- Total Carbohydrates: 8g
- Dietary Fiber: 0g
- Sugars: 0g
- Protein: 4g
📖 Recipe

Cheese Crispies
Ingredients
- 1 teaspoon cayenne pepper
- 1 teaspoon salt
- 3 cups sifted all-purpose flour
- 1 ½ cups butter softened
- 3 cups sharp cheddar cheese finely grated
- 1 ½ cups crispy rice cereal
Instructions
- Sift flour, salt, and cayenne. Cut in butter until crumbly.
- Add cheese and cereal; combine with hands.
- Shape into 1-inch balls and place on lined baking sheets.
- Flatten with fork or glass.
- Bake at 350°F for 15 minutes or until golden.
- Cool completely, then store in an airtight container.

Leave a Reply